3 - Files
Introduction
Setting up a workspace

Setting the Sprite Source File


Texture Coordinates


Last updated
Was this helpful?
Gum supports loading image files for Sprites and NineSlices. This tutorial discusses how to load files, and how they are referenced in Gum.
First we'll set up a workspace:
Create a Screen called SpriteScreen.
Drag+drop a Sprite into the newly-created Screen

Source File is the image that the Sprite displays. Usually Source Files are of the .png file format. To set the source file:
Select SpriteInstance
Find Source File in the Variables tab
Click the "..." button to bring up a file window
Navigate to the location of the file you would like to load
Click "Open" in the file window
Once Source File is set, the Sprite displays the image in the Editor tab

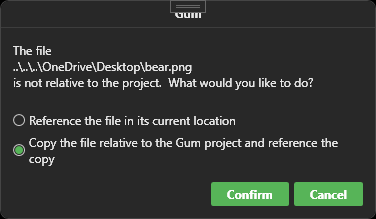
If you select a file which is not located in the same folder or a sub folder of your gum project, Gum asks if you would like to reference the file in its original location or create a copy.

Usually it's best to copy the file to the Gum project folder so that the Gum project can be moved to different computers without breaking file references.
Sprites can display portions of their Source File. Files which combine multiple images are often called sprite sheets or tile sheets, and are commonly used in game development to keep art organized and to improve performance.
For example, the following file contains images for an animated character, ground tiles, and other entities for a platformer game.
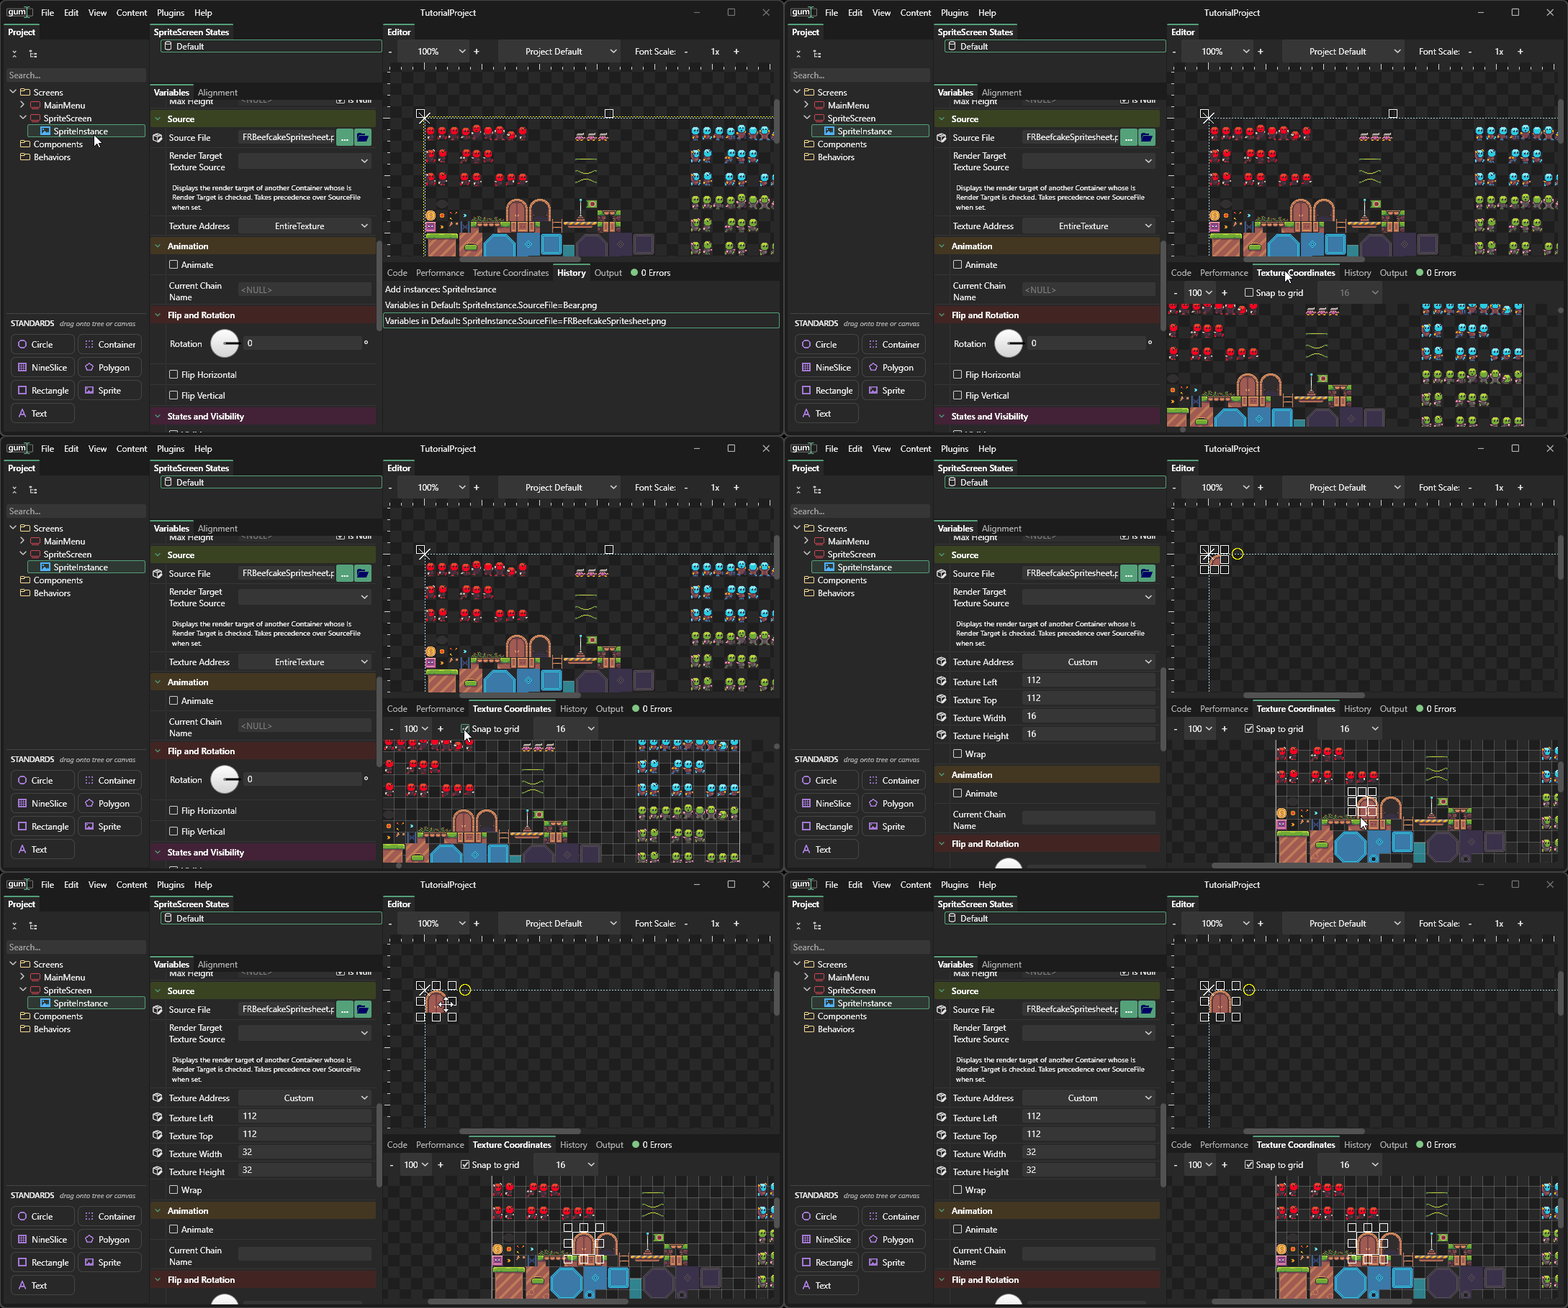
If we download this file and set it as our , then the sprite displays the entire file.

We can display a portion of the Sprite rather than the entire file:
Click on the Texture Coordinates tab
Check the Snap to grid option to make it easier to select a region
Double-click anywhere on the image to select a region around the cursor
Move the selected region to the desired location to adjust the sprite's texture coordinate values

Last updated
Was this helpful?
Was this helpful?